Hello!

I hope you enjoy my blog of my many adventures in life, and I promise to post as often as I can!

*Most photos I'll be sharing will be my own, if not I will do my best to link/share the original owner. I don't mind the pinning/sharing of my photos, but please ONLY the photos that have my MamaGooseAdventures signature on them. Thanks!


Pages

Friday, March 30, 2012

Pin Cushions

Wow!  I knew I was falling behind with keeping my blog updated, but I didn't realize that it's been over a month since my last post!  I have so many things to share!  We'll start with my pin cushions!I know I'm not the only one who hates the darn tomatoes or strawberries or whatever they are supposed to be.  At my first sewing class I actually got a blue one as part of a free beginners sewing kit, so I guess it was a blueberry?  Anyway, I think they are ugly, so I wanted to make something prettier to help keep me in a good mood while I'm working on projects, so off to Pinterest I went to look for some good ideas!

And this is what I found!  Too cute, right?!


So off to the store I went to get some cute fabric for mine.. I ended up getting a few fat quarters for $.99/each at walmart.  And I wish I had pictures from start to finish, but I dont, sorry!  But here is what I made:


I think it turned out pretty good! My first time sewing a cube, so I can't complain too much, but the one this I didn't care for was that it wasn't very sturdy.  I wanted something that would sit on mmy table without rolling over, so back to Pinterest I went where I found this tuna can pin cushion, and thought PERFECT!
upcycle-tuna-can-pincusion

The easy part was making tuna salad for lunch, but the hard part was cleaning the darn can!  I tried soap and water like suggested, but my can still stunk of tuna, so then I tried vinegar.  Still no luck.  Then I tried lemon juice, then bleach, then baking soda, and still the can stunk of tuna, so I gave up and threw the darn can away! 

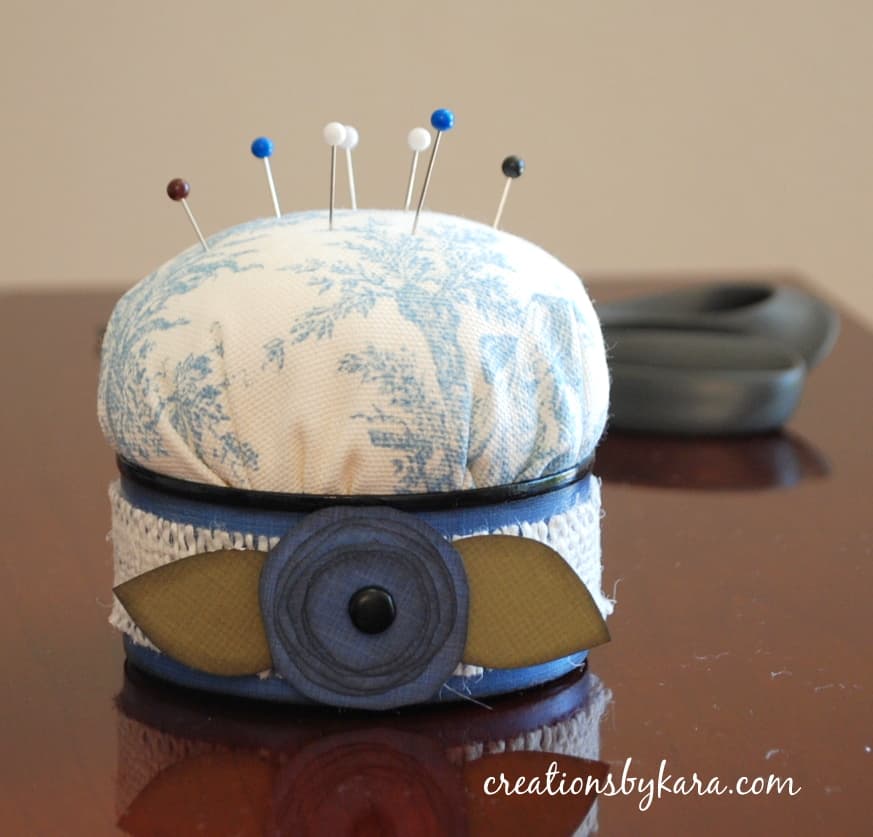
So I moved to Plan B, which was using a plastic yogurt container instead.  It was easy to clean, and easy to paint!  I was worried that it would be hard to paint because of the smooth surface, but to my surprise it was very easy.  I just used black craft paint and a brush and painted it on like you would on any other craft project.  It took about 3 coats to make it look even, but even still it only took maybe 15min.  After the last coat was dry, I sprayed it with a semi-gloss sealer to help prevent the paint from scratching off.  I followed the same directions used by Kara in the original post, except instead of shoving fiberfill into my fabric, I decided to just put a thin layer of fiberfill then put my ugly "blueberry" inside, tied it up, glued it into my yogurt container, and it fit perfectly!  Then, as Kara also did, I added some ribbon and buttons with hot glue to finish it off!

(Please ignore the white thread!  It kept sticking, darn static!)

Now my ugly "blueberry" is cute as a button, and I love, love, love it!  Goose calls it a cupcake and says "Yum Mama!" everytime she sees it!

Photobucket

Friday, February 10, 2012

Taste the Rainbow II

Speaking of rainbows, I guess now would be good a time as any to share the Christmas gift I made for my mom's fiance!

I joined BabyCenter.com when I was pregnant with Goose, and within BabyCenter there is a group called Crafty Mamas which I joined.  A couples months before Christmas they started a post called "Homemade Gifts" where I found this gift idea...
So what is the gift you ask???  Jolly Rancher Vodka! 


Here's how I made it:


Supplies:
  • Jolly Ranchers
  • 5 Mini-Vodka Bottles
  • 1 Large Bottle of Vodka
  • Goo-Gone
Directions:
Step 1
Empty out our mini-vodka bottles and use Goo-Gone to clean off the labels, and wash them with soap and water.  Alternatively, you could also purchase empty clear glass flasks for this.  I personally could not find inexpensive glass flasks, so that's why I opted to go this route.

Step 2
Unwrap your Jolly Rachers and place in your flasks/bottles.  I used 3 of each color for my 2.5oz bottles.  Next, fill your bottles with vodka.  Make sure to leave some space at the top because as the Jolly Ranchers dissolve, it will fill the bottle more.  Now you just let them sit on the counter until the candy dissolves!

Here's what they will start to look like:

And what they will look like when they're all done!
You may have to shake them a little to make sure they are mixed well.  I can't remember exactly how long it took for the candy to dissolve, but I'm preetty sure it took a couple days.  And like I shem!aid, I'm not an alcohol drinker, so I didn't try these when they were done, but if you are a Jolly Rancher lover and love your vodka, then I'm sure you would love them combined!  (I know my mom's fiance loved them!)

Enjoy!
Photobucket

Taste the Rainbow

On one of my random browsings on Pinterest I came across this awesome Rainbow Bread, so I pinned it.  DaddyGoose had been really into making homemade bread lately, and has made both white and rye bread.  I've been feeling left out, so yesterday I took the plundge and not only made my first loaf of homemade bread, but it was my first time using a bread machine, and my first attempt at making rainbow bread. 

All I can say is wow!  It turned out way better than I was expecting it to!  The crust was a little on the hard side, but the inside was perfect.  And the "hardest" part was mixing the different colors into the bread.. Actually, it wasn't that difficult, more time-consuming than anything.  I think I'll make some more this weekend for Jocelyn's Princess Valentine's party!


Photobucket

Tuesday, February 7, 2012

Book me!

Well, since my class yesterday I've been itching to sew something else, so I did!  I searched online for some simple projects that didn't use alot of fabric (since I really only have scraps that I got after raiding my mom's sewing drawer), and I came across this fabric heart bookmark.  I gave it a whirl, and I had the hardest time!  I thought I would have no problem around the curves, but it was so hard.  I'm sure with practice I will eventually get it, but needless to say, my bookmark did not turn out well at all!  (Hence the reason there is no picture!) 

So since that didn't turn out as planned, I wanted to try something else that would hopefully come out better.  I started searching again and found this checkbook cover.  I figured it only had straight stitches and only used 2 pieces of fabric (well 4 if you include the interfacing), and since I learned about interfacing in my class yesterday, I figured I'd give it a try!

The results... I am very happy with how it turned out!  I cut my fabric a little crooked, and therefore my stitching is a little off, but oh well!  It's only my 2nd project, right?!  If I make one again, I think I will make it wider and longer so my checkbook and register can fit in it better, so that it can stay closed on it's own.  Or maybe I'll get adventurous and figure out a way to put a tie or a button on it!


Photobucket

I'm finally sewing!

I finally had my first sewing class yesterday, Sewing 101 at Joann's, and all I have to say is that I am in LOVE with sewing!  It was a 2 1/2 hour class and I learned a TON!  About fabric, thread, needles, and tools, etc.  Plus we made a small bag for our project, and the best part is there was only 1 other lady in the class so I had a lot of one-on-one help learning about MY sewing machine!

Here's my beautiful sewing machine!  It's a Singer Brilliance and a gift from my mom for Christmas. Thank you mom!  I know I'm just beginner, and I don't remember anything about the type of machine I used in home ec, but the features I love on my machine are the automatic needle threader, the automatic reverse button, and of course the 99 decorative stitches I have to choose from!  I don't know if I will ever even use them all, but I love having options.  =0)

And here is the project I made in class!  It's a small draw string bag.  I'm not sure what size it is after sewn, but the pattern we used was a basic 8.5x11 sheet of paper.  It has a lot of imperfections, but I am very proud of my first project!  It's great for holding all my little sewing supplies!

I'm already signed up for Sewing 201 in a couple weeks, and can't wait to learn more!  I'm really itching to make something else, so I'm most likely going to find a simple project to practice with, or maybe I'll make another bag, who knows!
Photobucket